Circuit Construction & Decoding
Overview of the Arduino development process
Circuit Construction
The circuit was made using EasyEDA’s platform; it’s completely free and can be downloaded from here.
The circuit file can be downloaded from here.
After you perform your analysis on the circuit you can then move to the PCB design stage.
In EasyEDA click
Design > Convert Schematic to PCB > No, Keep Going. A shortcut is just pressingAlt + P.It will ask you then for board measurements. You can use the standard Arduino Uno specifications found here.
Tip: If you want to save time and not make the right indentations just make the board using the max dimensions of \(L \times B = (2.7 \times 2.1) inch\)
You can now restructure, modify the PCB any way you wish! Save the file and use any PCB manufacturer of your choosing.
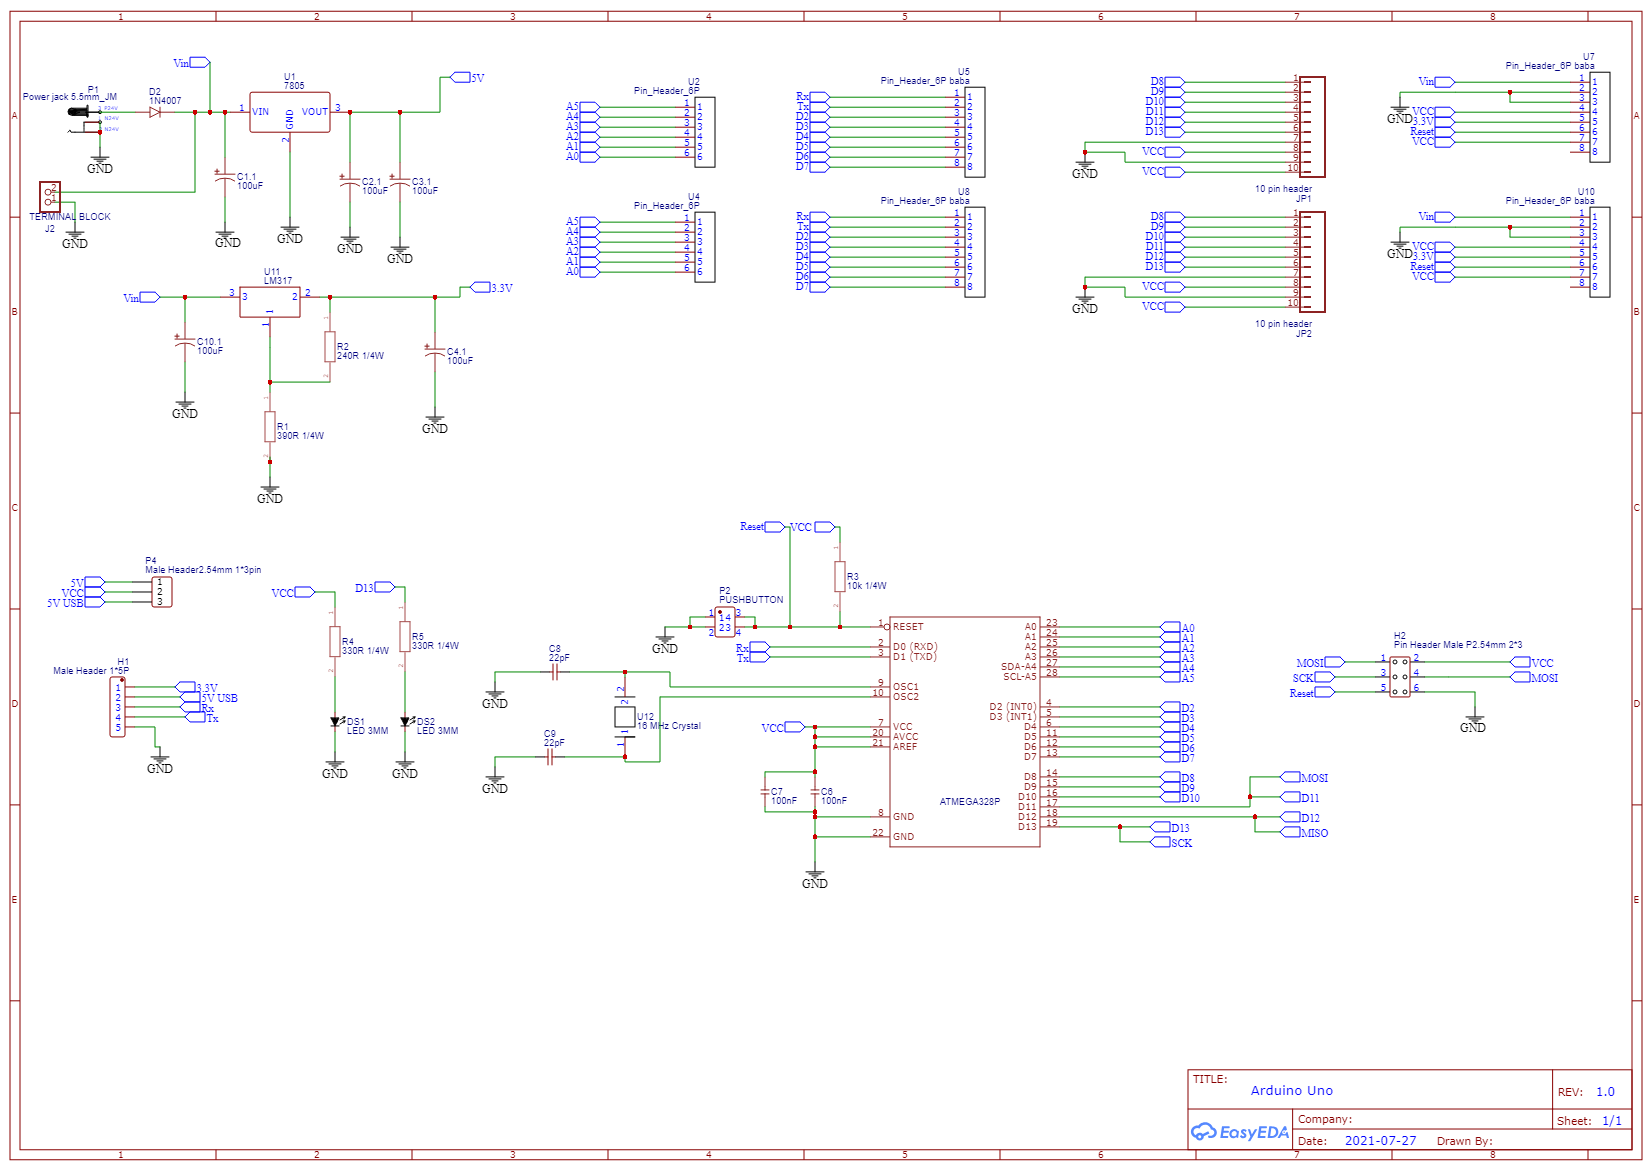
Circuit Decoding
- If you want to just see what connects where open the schematic file from here or see the image below.
- Open the generated Gerber file from here and then trace the path of the components.
Credit: Instructables